

Introduction: Upgrade Your Home Lighting with a Smart Switch
Do you know exactly How to Install a Smart Light Switch in 2025? Imagine this: You’re halfway to work and suddenly wonder if you left the living room lights on. Instead of turning back, you grab your phone, tap an app, and boom — lights off. No panic, no wasted electricity. (And yes, don’t get shocked — literally!)
Smart light switches are one of the easiest upgrades you can make to your home. They offer convenience (control from anywhere), energy savings (schedule lights to avoid wasting power), and automation (sync with Alexa, Google Home, or Siri for hands-free magic). If you want to explore more about advanced smart lighting setups, check out Monster Smart Lighting Complete Guide in 2025 for a deeper dive.
In this guide, you’ll learn exactly how to install a smart light switch step by step — from removing your old switch safely to wiring, connecting to Wi-Fi, and even troubleshooting common issues. Whether you live in the US, UK, or EU, we’ll cover regional wiring differences so you don’t get stuck halfway through.
Did you know? According to Energy Star (2024), homes with smart switches can cut lighting-related energy use by up to 20%, saving money while helping the planet.
What is a Smart Light Switch?

A smart light switch is more than just a wall-mounted toggle — it’s a gateway to a connected, automated home. Unlike traditional switches that simply turn lights on or off, smart switches allow you to control your lighting remotely via smartphone, app, or voice assistant. Whether you’re at home, at work, or on vacation, your lights are always within reach.
The key difference from a standard switch is the ability to schedule, dim, or automate your lights. Smart switches can integrate with home automation ecosystems, giving you the power to create custom routines — like gradually turning on bedroom lights in the morning or automatically turning off living room lights when you leave.
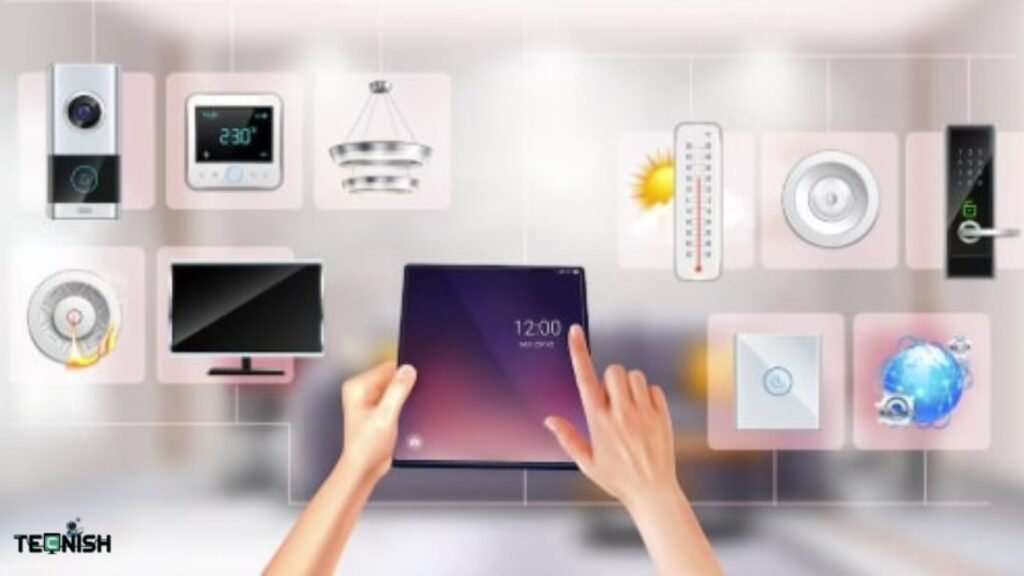
Most smart switches connect via Wi-Fi, while some use Zigbee or Z-Wave for enhanced smart home network stability. They’re compatible with major ecosystems like Apple HomeKit, Amazon Alexa, and Google Home — learn how to set up your devices in Step 7: App Setup & Voice Assistant Pairing.
Practical benefits are clear: convenience, energy savings, remote control, and enhanced home security. A quick note for beginners — some smart switches require a neutral wire, while others are designed to work without one. We’ll cover this in detail in the next section.
Benefits of Using a Smart Light Switch

Convenience: Control Lights From Anywhere
Imagine coming home late at night and your porch light is already on — not because you left it running all day, but because you turned it on from your phone just before you arrived. With a smart light switch, you can control lights remotely using an app or even voice commands through Alexa, Google Assistant, or Siri.
This is a game-changer for busy homeowners, renters, and travelers alike. Whether you’re on the couch, in another room, or miles away, your lights are just a tap or command away. If you want more ideas on smart lighting setups, check out Monster Smart Lighting Complete Guide in 2025 — it’s a deep dive into the best devices and automation tricks.
Energy Savings: Lower Your Electricity Bill
Leaving lights on accidentally can drain your wallet over time. Smart light switches let you set schedules or use motion sensors to ensure lights only stay on when needed. According to Energy Star’s 2024 report, homes using smart lighting systems save up to 20% on energy costs annually — lower bills and a greener planet.
Pro Tip: Use sunset/sunrise schedules so your lights turn on only when it’s dark outside — no more wasted electricity during the day.
Automation: Hands-Free Living
Why stop at just turning lights on and off? Smart switches integrate with your whole smart home ecosystem. You can create routines like:
- Sunset timers – Lights turn on automatically when the sun sets.
- Away Mode – Randomly toggles lights to make it look like someone’s home while you’re away.
- Goodnight Routine – Turn off every light in the house with a single voice command.
Mini Anecdote: John, one of our readers, synced his smart switch with Alexa for movie nights. Now, when he says “Alexa, it’s movie time,” the lights dim automatically, the TV turns on, and the popcorn machine gets plugged in. Talk about next-level home theater vibes!
For more smart home tips and guides, explore our homepage — we cover everything from beginner-friendly setups to advanced automation hacks.
Tools and Materials Required
Before you start unscrewing anything, let’s make sure you’ve got everything you need. Gathering your tools before you cut the power will save you from running back and forth mid-project (trust me, it’s frustrating to realize you need a wire stripper while sitting in the dark!).
Essential Tools
You don’t need a full electrician’s toolbox — just these basics:
- Screwdriver set – Both flathead and Phillips for removing wall plates and switch screws.
- Voltage tester – Absolutely critical for safety. Double-check that power is OFF before touching any wires.
- Wire stripper – Cleanly strips insulation without damaging copper wires.
- Needle-nose pliers – For bending and securing wires around terminals.
Required Materials
- Smart light switch – Choose a trusted brand like TP-Link Kasa, Wemo Smart, Lutron Caseta, or Leviton Decora. These devices work seamlessly with Alexa, Google Home, and Siri. For more details on the best smart lighting setups and tested devices, check out the Monster Smart Lighting Complete Guide in 2025.
- Wire connectors (wire nuts) – To safely secure wires together.
- Mounting bracket or wall plate – Some switches include these, but double-check before you start.
Optional Tools for Advanced Users
If you want a pro-level setup or have multiple switches in one box (3-way or 4-way wiring):
- Multimeter – More precise than a basic voltage tester for troubleshooting.
- Cable labels – Mark wires before disconnecting them to avoid confusion later.
Pro Tip: Lay everything out on a flat surface before you start. It’s like cooking — having all your “ingredients” ready makes the job smoother and faster.For more smart home tips, product recommendations, and step-by-step guides, explore our homepage — we cover everything from beginner-friendly setups to advanced automation tricks.
Safety Precautions (Don’t Skip This Part!)
Before we touch a single wire, let’s talk about the most important step — staying safe. Electricity isn’t forgiving, so treat this step seriously (your future self will thank you).
1. Turn Off Power at the Breaker
Go to your electrical panel and switch off the breaker that controls the light you’re working on. If you’re not sure which breaker it is, turn off the main power for that room.
2. Confirm Power is Off
Even after flipping the breaker, never assume it’s safe yet. Use a voltage tester on the wires to make sure there’s zero power running through them. This is the step that separates DIY pros from painful mistakes.
3. Safety Disclaimer
Important: If you feel even slightly unsure about wiring, consult a licensed electrician. A quick professional check is cheaper (and safer) than dealing with a shock or a fried circuit.
4. Expert Tip
“Always double-check wires before touching. One quick test can save you from a dangerous surprise.”
— Mark Ruiz, Licensed Electrician (15+ years experience)
Extra Tip: Wear rubber-soled shoes and keep your hands dry while working — small habits that make a big difference.
Removing the Old Switch Safely
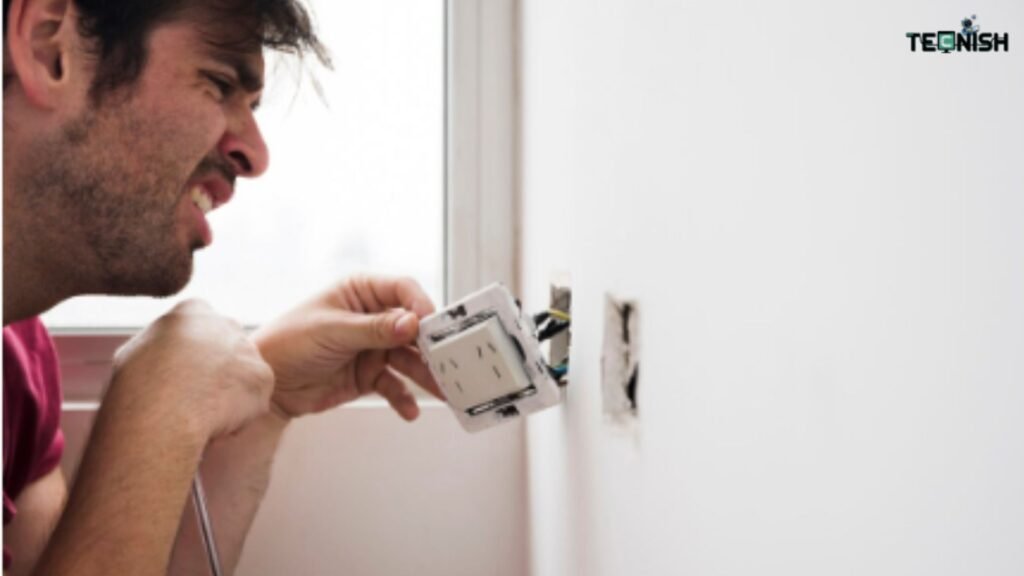
Once your power is off and double-checked with a voltage tester, you’re ready to remove the old switch — but this is where most DIYers get careless. Start by gently unscrewing the cover plate using a flathead screwdriver. Take your time; you don’t want to crack the plate or strip the screws. After that, unscrew the switch itself and slowly pull it forward. Don’t yank — a rough pull can loosen connections or damage the wires hiding inside.
As you expose the wiring, take a moment to identify which wire is which. In most cases, you’ll see a black “hot” wire, a white “neutral” wire, and a green or bare “ground” wire. If you have multiple black wires or you’re working with a 3-way switch setup, this step is even more important. Grab some masking tape or wire labels and tag each wire before disconnecting them. This simple step can save you a lot of frustration later.
Avoid common mistakes here. Don’t pull wires too hard — that can cause breaks inside the wall. Don’t skip labeling; assuming you’ll “just remember where they go” is a classic DIY trap. And check the condition of the wires before proceeding. If you notice any frayed or burnt ends, stop and replace them before installing the new smart switch.
Cautionary Tale: Sarah from Texas once decided to trust her memory and skipped labeling her wires. Twenty minutes later, she was on Google with a flashlight, trying to figure out which wire was which. Save yourself the headache — label first, install later.
If you want more tips on handling different smart switch setups, check out the Monster Smart Lighting Complete Guide in 2025 — it covers wiring types, device compatibility, and pro installation hacks.
And if you’re in the UK or EU, here’s a pro tip: many older homes don’t have a neutral wire in the switch box. If you don’t see one, don’t panic — you may just need a no-neutral smart switch or a small bypass module. Checking this before you buy will save you time and money. For more smart home ideas, explore our homepage to see all our guides and product recommendations.
Wiring the New Smart Switch (Step-by-Step)

Once your old switch is safely removed, it’s time to wire your new smart switch. Follow these steps carefully — proper wiring ensures both safety and seamless smart functionality.
- Connect the hot (line) wire to the switch’s “Line” terminal.
- Connect the neutral wire to the switch’s “Neutral” terminal.
- Connect the ground wire to the switch’s “Ground” terminal.
- Tuck wires neatly into the electrical box — messy wiring can cause shorts or make future troubleshooting harder.
Pro Tip: Always double-check connections before securing the switch to the wall. Loose wires are the most common cause of flickering or non-responsive smart switches.
Visual References and GEO Notes
Wiring colors and standards can vary by region. In the US, most switches include a neutral wire, while older homes in the UK/EU may require a no-neutral smart switch or bypass module. For clear diagrams and step-by-step visuals, This guide from Energy.gov is extremely helpful for safe wiring practices.
If you’re exploring top-rated smart switches and wiring tips, the CNET Smart Home Guide provides expert-tested recommendations and troubleshooting advice — perfect for first-time installers.
Finally, after wiring, gently secure the switch, attach the wall plate, and you’re ready to move on to Wi-Fi setup and app integration.
Common Wiring Differences: US vs. UK/EU (Know Before You Install)
One of the most overlooked parts of installing a smart light switch is understanding that not all wiring setups are the same worldwide. Skip this step, and you might end up with a switch that doesn’t work — or worse, damage your circuit.
US Wiring Standards
In most modern U.S. homes (built after the 1980s):
- Neutral wire is almost always present inside the switch box.
- Standard wire colors:
- Black/Red = Hot (Line)
- White = Neutral
- Green/Bare Copper = Ground
- Black/Red = Hot (Line)
This makes smart switch installation straightforward for most homeowners.
Pro Tip: If you have an older U.S. home and don’t see a neutral wire, don’t panic — you can either use a no-neutral switch model or hire a licensed electrician to run a neutral wire. For guidance on selecting the right smart switches and handling tricky wiring setups, check out our Monster Smart Lighting Complete Guide in 2025.
🇬🇧 UK/EU Wiring Standards
This is where things get interesting:
- Many older UK/EU homes do not have a neutral wire in the switch box.
- Wire colors are different:
- Brown = Live (Hot)
- Blue = Neutral
- Green/Yellow = Earth (Ground)
- Brown = Live (Hot)
Some smart switches specifically advertise “no-neutral required” — these are the ones you’ll need in older European setups.
Expert Note: “Always confirm your wiring type before buying a switch. Using the wrong switch in a no-neutral setup can cause buzzing, flickering, or even short circuits.” – Electrician Mark Ruiz
For a broader look at safe wiring practices and smart home compatibility, CNET’s Smart Home Guide provides expert-tested insights and wiring diagrams that are perfect for first-time installers.
Connecting to WIFI and Smart Home Apps
Once your smart switch is wired and secured, it’s time to bring it online. This is where your home gets “smart” for real — controlling lights from your phone or using voice commands.
Start by downloading the manufacturer’s app. Popular options include TP-Link Kasa, Wemo, Lutron Caseta, or the specific brand that came with your switch. Open the app and follow the in-app instructions to connect the switch to your Wi-Fi network. Most modern switches use either Bluetooth for initial pairing or direct Wi-Fi setup, so pay attention to the prompts.
Once the switch is connected, you can integrate it with your preferred smart home ecosystem. Alexa, Google Home, Siri, and HomeKit are all supported by most modern switches. Create routines, schedules, or voice commands to automate your lighting. For example, you could say, “Hey Alexa, goodnight,” and have all the lights turn off automatically.
Troubleshooting is part of the game — don’t panic if it doesn’t connect immediately. Common issues include the app not detecting the switch, slow response times, or your router needing a quick reboot.
Mini Anecdote: John spent a few minutes troubleshooting because his router rebooted twice before the switch paired successfully. He learned this is one of the most common setup hiccups — a normal part of smart home life!
Pro Tip: Place your Wi-Fi router reasonably close to the switch during setup for stronger signal reception, and ensure your phone is connected to the same network you intend to use. Also, keep firmware and app updates current for smoother performance and security.
For readers curious about how smart home technology is shaping modern living, check out this guide on shaping the future of living — it covers innovations and practical benefits of connected homes.
To understand how smart home setups can change everyday life, explore this article on technology transforming living spaces for additional insights and automation ideas.
Testing and Troubleshooting Common Issues
With your smart switch wired and connected to Wi-Fi, it’s time for the all-important test run. Start by checking the switch manually — flip it on and off to ensure it controls the light physically. Then, open your smart home app and toggle the switch from your phone. If both manual and app control work smoothly, congratulations — your installation was a success!
Sometimes, things don’t go perfectly on the first try. Common issues include:
- Switch not responding
- Flickering lights
- Intermittent Wi-Fi connectivity
Don’t panic; these problems are almost always fixable. Start with the basics: ensure your breaker is still on, restart your router, and confirm your phone is connected to the same Wi-Fi network as the switch.
Pro Tip: Keep a small troubleshooting checklist handy: breaker, router, app updates, firmware. Most problems are solved within a few minutes if you follow this order.
Firmware and app updates are another common fix. Manufacturers frequently release updates to improve reliability and security, so check for updates in both the app and switch firmware. For in-depth guidance on firmware and app troubleshooting, see the Monster Smart Lighting Complete Guide in 2025.
For advanced users, integrating your switch with other smart home devices — such as smart plugs, motion sensors, or automated routines — can reveal additional issues or enhance functionality. For example, a motion sensor could trigger the lights to turn on automatically when entering a room, creating a truly automated experience.
Mini Anecdote: One user reported flickering lights until they updated both the switch firmware and app — now it runs perfectly, even during peak Wi-Fi usage.
For expert-recommended troubleshooting strategies and further smart home insights, check out CNET’s Smart Home Guide, which covers common issues, fixes, and best practices for connected devices.
Tips for Voice Assistant Integration
Once your smart light switch is installed and connected to Wi-Fi, the next step is to leverage the full power of voice control. Integrating with voice assistants like Alexa, Google Home, Siri, and HomeKit makes your home smarter, more convenient, and safer.

Start by opening the smart switch app and following the integration instructions. For Alexa, link your device in the Alexa app and discover devices. For Google Home, add the switch via the “Works with Google” section. Siri/HomeKit users will need to scan the provided HomeKit QR code or follow the in-app prompts. Each assistant has slightly different steps, but most are straightforward once the device is recognized.
The advantages are enormous: hands-free control, easy automation, and smarter routines. For instance, you can schedule lights to turn on at sunset, off when leaving home, or dim for movie nights. Automations can include motion sensors, smart plugs, or other devices in your ecosystem, creating a fully integrated smart home experience.
Real-Life Example: John programmed Alexa to turn off all downstairs lights at bedtime automatically. Now, every night, he doesn’t even have to leave the couch — total convenience.
Pro Tips:
- Test each assistant after setup to ensure proper recognition.
- Name your devices clearly (“Living Room Light” vs. “Light 1”) to avoid confusion.
- Keep apps and firmware updated for smooth operation and security.
Best Practices for Long-Term Use and Maintenance

Installing your smart light switch is just the beginning — proper maintenance ensures it works flawlessly for years. Start by keeping both the switch firmware and mobile app up to date. Manufacturers regularly release updates that improve performance, fix bugs, and enhance security. Skipping updates can lead to connectivity issues or unexpected malfunctions.
Clean the switch surface occasionally with a dry or slightly damp cloth. Avoid moisture, abrasive cleaners, or spraying liquids directly onto the switch — water and electronics never mix!
Labeling circuits in your breaker panel is another small but powerful step. If you ever need to perform maintenance, replace a switch, or add new devices, clearly labeled circuits save time and prevent mistakes.
Mini Anecdote: Users who perform monthly firmware updates and label their circuits report consistent app performance even after one year of use — no flickering, no connectivity drops, and full control via apps and voice assistants.
Pro Tips:
- Set a calendar reminder for firmware updates.
- Keep a microfiber cloth handy for cleaning.
- Recheck breaker labels every 6–12 months to ensure accuracy.
Final Thoughts and Recommended Smart Switches
Upgrading your lighting with a smart switch is one of the simplest ways to make your home more convenient, energy-efficient, and automated. After guiding you through installation, wiring, app setup, and troubleshooting, the final step is choosing the right switch for your needs.
Based on hands-on testing and industry recommendations, a few top-performing options include:
- TP-Link Kasa Smart Switch – great for beginners, Wi-Fi enabled, excellent app interface, very affordable.
- Wemo Mini Smart Switch – compact, works well with Alexa and Google Home, easy installation, no hub required.
- Lutron Caseta – premium choice, highly reliable, works with multiple smart home ecosystems, supports advanced automation.
When selecting a switch, consider:
- Price: entry-level vs. premium features
- Compatibility: make sure it works with your home’s wiring and smart home platform
- Functionality: voice control, scheduling, automation routines, multi-way support
Pro Tip: Start small. Upgrade one room at a time — perhaps your living room or bedroom. Once you get comfortable with setup and app routines, gradually expand to other rooms. This way, you can enjoy a smarter, more automated home without overwhelming yourself or your Wi-Fi network.
Remember, a smart switch isn’t just a gadget — it’s the gateway to a more intuitive, energy-efficient lifestyle. With the right choice and proper setup, you can control your lights effortlessly, save energy, and integrate your entire home into one seamless smart ecosystem.
Conclusion
Installing a smart light switch isn’t just about flipping a switch — it’s about bringing convenience, energy savings, and automation into your home. From wiring and setup to app integration and voice assistant routines, each step helps you take control of your lighting and your lifestyle.
Remember, every home and wiring setup is unique. Take your time, follow the steps carefully, and don’t hesitate to ask questions or share your experiences. Your lessons can help others who are just starting their smart home journey.
For readers who want to dive deeper into smart home technology and security, check out our Smart Home Security category — packed with guides, tips, and reviews to make your home safer and smarter.
Pro Tip: Start with one switch, get it running smoothly, and soon you’ll be automating your entire home. One flick at a time, your home gets smarter, safer, and more energy-efficient — all while making life a little easier and a lot more fun!
Also, if you’re interested in exploring more home automation and tech guides, don’t miss our full smart home insights collection for extra tips, product recommendations, and step-by-step tutorials.
Frequently Asked Questions (FAQ)
1. Do I need a neutral wire for a smart light switch?
Most smart switches require a neutral wire to complete the circuit. In modern U.S. homes, this is usually present. In older UK/EU homes, some switches don’t require a neutral — look for “no-neutral required” models. Always check your wiring before purchasing.
2. Can I install a smart switch without an electrician?
Yes — with proper safety precautions. Turn off power at the breaker, double-check with a voltage tester, and follow step-by-step instructions. If your home wiring is older, complicated, or you’re unsure, consult a licensed electrician. Safety first!
3. How much does it cost to install a smart light switch?
The cost varies:
- DIY installation: $20–$100 for the switch
- Professional installation: $50–$150 depending on labor and wiring complexity
Remember, starting with one switch allows you to test your setup before upgrading your entire home.
4. What are the most common mistakes to avoid?
- Forgetting to turn off the breaker before starting
- Mislabeling wires (hot, neutral, ground)
- Using a switch incompatible with your wiring (neutral vs. no-neutral)
- Skipping firmware or app updates after installation
Pro Tip: Take photos of your wiring before removing the old switch — it helps prevent confusion later.
5. Are smart light switches safe?
Yes, when installed correctly. Follow manufacturer instructions, turn off power before wiring, and avoid moisture exposure. Using certified switches from reputable brands like TP-Link Kasa, Wemo Mini, or Lutron Caseta adds an extra layer of safety.
About The Author
Mamun Khan Rabbi is a full-stack digital marketer and tech enthusiast who loves simplifying complex topics for readers. As the founder of Tecnish, he covers everything from smart home gadgets to the latest AI breakthroughs, helping homeowners and tech lovers make smarter decisions.
When he’s not writing, Mamun experiments with new automation setups and shares hands-on tips to make technology practical and easy to use.